Traditional Honey Layer Cake
Paper-thin caramelized honey layers, a tangy sour cream frosting, and one essential overnight rest — the classic that turns from biscuit-crisp to melt-in-your-mouth soft.
There is something deeply nostalgic about the aroma of caramelized honey wafting through a warm kitchen on a quiet weekend. For many of us, the traditional honey layer cake — often layered with fond memories of family gatherings, birthdays, and festive winter holidays — is the absolute pinnacle of home baking. Growing up, this wasn’t a dessert you could simply rush. It was a beautiful, multi-day labor of love that required patience, shifting from hard, biscuit-like sheets into a velvety masterpiece overnight.
What makes this specific version so special is its commitment to the old-school method. Instead of relying on modern shortcuts or oversweet buttercreams, we stick to the authentic harmony of real, deeply flavored meadow honey and the characteristic tang of high-fat sour cream. As the cake rests, a wonderful chemical reaction takes place: the dry, paper-thin sheets slowly absorb the moisture from the filling, fusing together into a single, melt-in-your-mouth structure. It is rich without being heavy, traditional yet timeless, and guaranteed to steal the show at any dinner table.
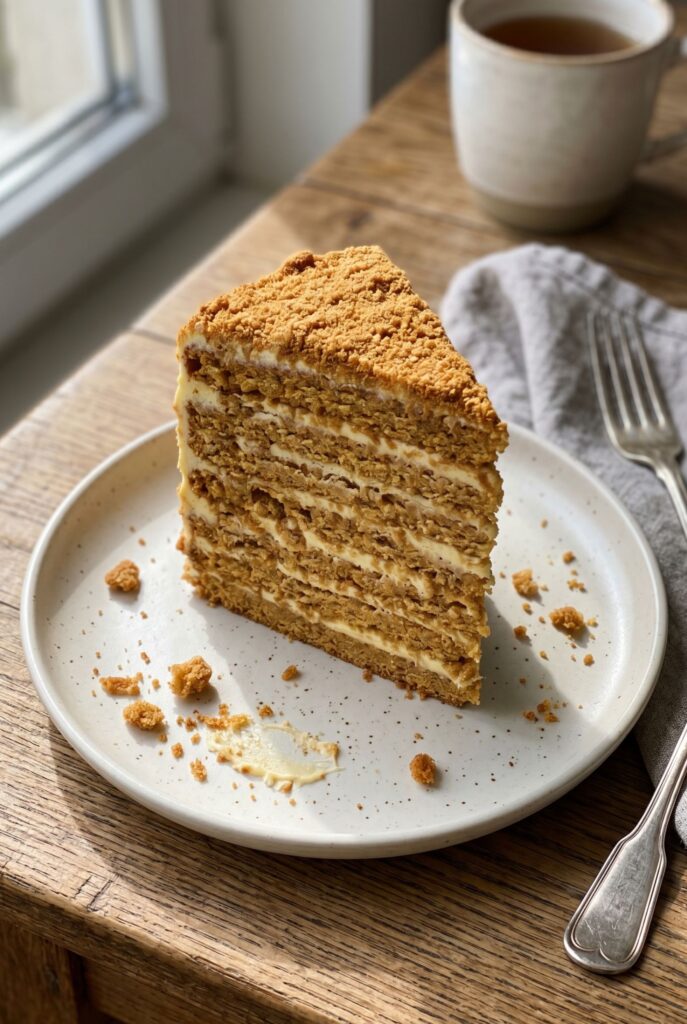
This traditional honey layer cake is a timeless classic that brings together soft, honey-infused cake layers and a tangy, velvety sour cream frosting. Known for its melt-in-your-mouth texture, this authentic recipe is perfect for holidays, family gatherings, or any special occasion that calls for a truly unforgettable dessert.
The magic of authentic honey cake
A true honey layer cake is all about patience and balance. The deep, caramelized flavor of natural honey in the dough contrasts beautifully with the slight tartness of the sour cream filling.
Unlike modern cakes that rely on heavy buttercream, this traditional dessert absorbs the moisture from the frosting over time. This unique process transforms the baked layers into an incredibly soft, delicate texture that cuts like butter.
Recipe at a glance
| Detail | Time / Servings |
|---|---|
| ⏱️ Prep Time | 45 Min |
| 🍳 Baking Time | 30 Min |
| ❄️ Resting Time | 12 Hours |
| 🍽️ Servings | 16 Servings |
Ingredients you’ll need
For the honey dough layers
- 150 g natural honey
- 150 g granulated sugar
- 100 g unsalted butter
- 3 large eggs
- 1 tsp baking soda
- 500 g all-purpose flour
- A pinch of salt
For the sour cream frosting
- 800 g high-fat sour cream (at least 20% fat or Smetana)
- 200 g powdered sugar
- 400 ml heavy whipping cream
- 1 tsp vanilla extract
Important ingredient notes
The honey: Always use real, aromatic honey (like forest or meadow honey). Artificial or highly processed honey lacks the strong flavor profile needed to cut through the flour and dairy.
The sour cream: Do not use light or low-fat varieties. High-fat sour cream provides the necessary acidity to soften the honey layers while maintaining enough structure so the cake doesn’t become soggy.
The full recipe
Here’s everything condensed into one printable card — check off ingredients as you go, and follow the numbered steps in order.
Traditional Honey Layer Cake
Yield: 16 servings · Prep 45 min · Bake 30 min · Rest 12 hrs+
Honey dough layers
Sour cream frosting
Method
- Caramelize the honey base. Melt honey, sugar and butter together over a double boiler until smooth and amber-colored.
- Add baking soda and eggs. Whisk in the eggs, then add baking soda; the mixture will foam up and increase in volume.
- Knead and divide the dough. Fold in the flour to form a soft dough, then divide into 6-8 equal portions.
- Roll and bake the layers. Roll each portion paper-thin, prick with a fork, and bake at 180°C (350°F) for 4-5 minutes until golden.
- Prepare the frosting. Whisk sour cream, powdered sugar and vanilla, then fold in whipped heavy cream.
- Assemble the cake. Stack the layers with frosting between each, then coat the top and sides with the remaining cream.
- Rest overnight. Refrigerate for at least 12 hours, preferably 24, so the layers soften into the cake.
Step-by-step instructions
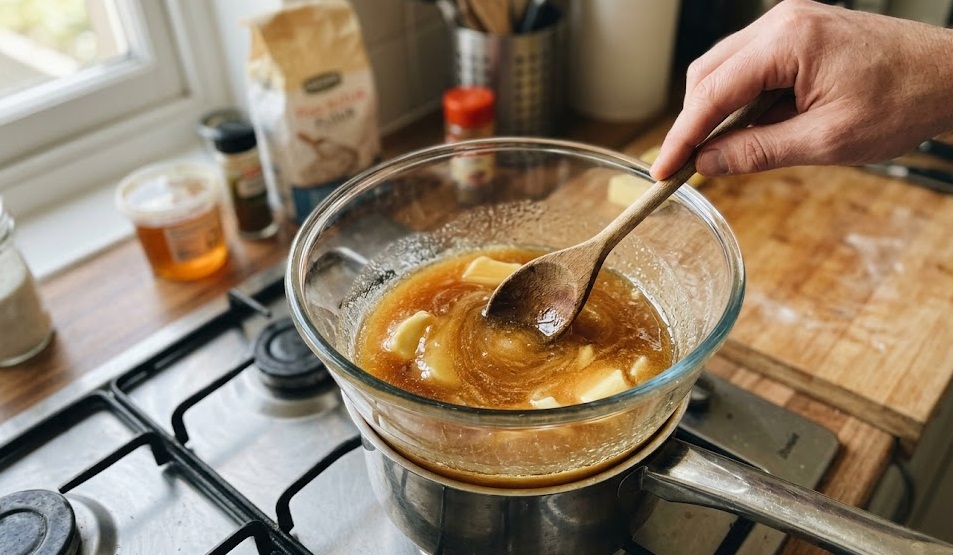
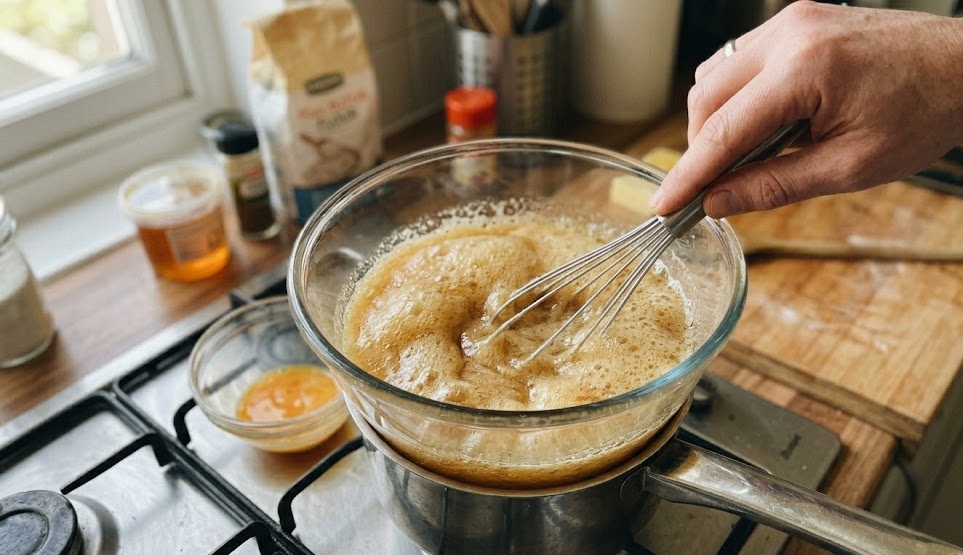
Step 1: Caramelize the honey base
In a heatproof bowl set over a pot of simmering water (double boiler), combine the honey, sugar, and unsalted butter.
Stir continuously until the butter melts and the sugar completely dissolves into a smooth, amber-colored liquid.
Step 2: Add baking soda and eggs
Whisk the eggs in a small bowl and slowly pour them into the warm honey mixture while whisking vigorously to prevent scrambling.
Add the baking soda. The mixture will immediately foam up and increase in volume — this chemical reaction is exactly what makes the layers soft and airy.
Step 3: Knead and divide the dough
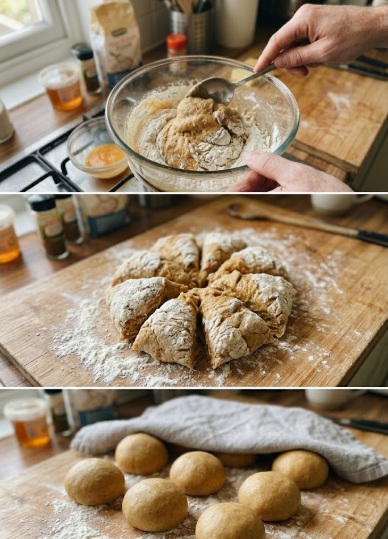
Remove the bowl from the heat and gradually fold in the all-purpose flour until a soft dough forms. It will be slightly sticky while warm.
Turn the dough onto a floured surface and divide it into 6 to 8 equal portions. Roll each piece into a smooth ball and cover them with a clean towel.
Step 4: Roll and bake the layers
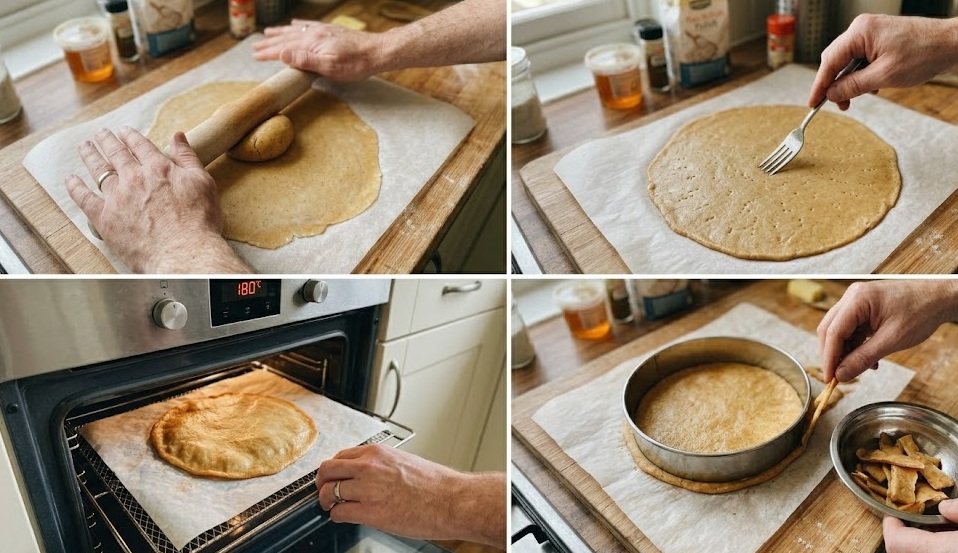
Preheat your oven to 180°C (350°F). Roll out each dough ball directly onto a sheet of parchment paper until it is paper-thin.
Prick the dough with a fork to prevent large bubbles, and bake each layer for 4 to 5 minutes until golden brown. Trim the edges while warm and save the scraps.
Step 5: Prepare the frosting
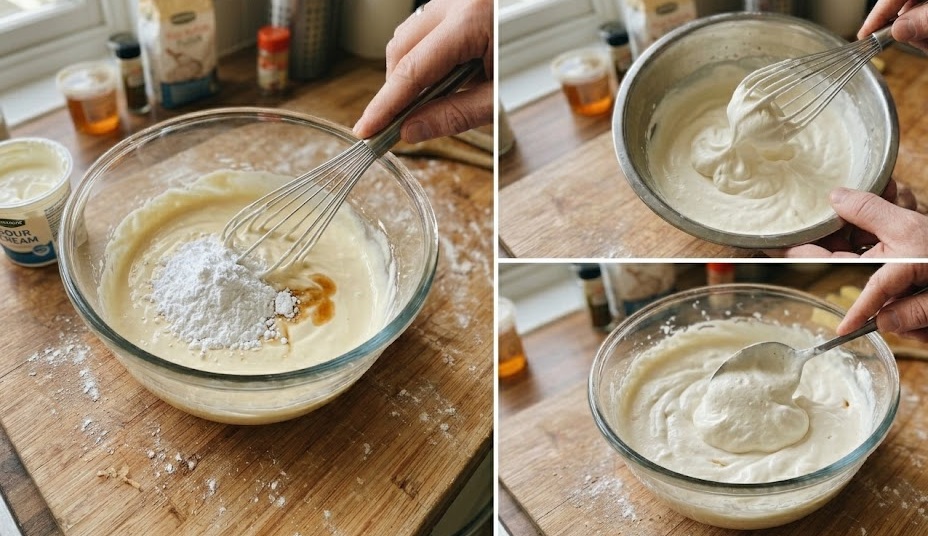
In a large bowl, gently whisk together the chilled sour cream, powdered sugar, and vanilla extract until completely smooth.
In a separate bowl, whip the heavy cream to medium peaks, then gently fold it into the sour cream mixture to create a light, fluffy filling.
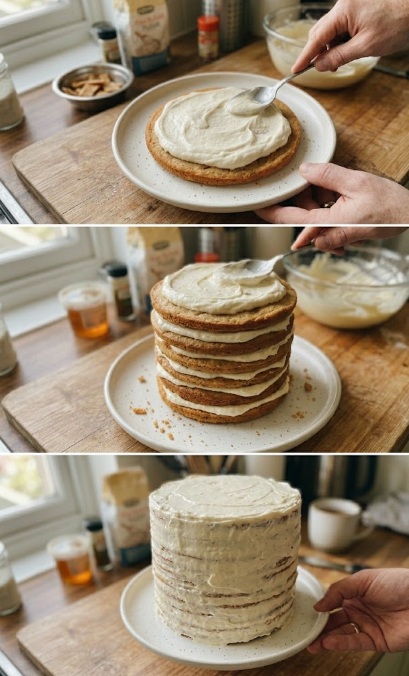
Step 6: Assemble the cake
Place the first baked layer on your serving plate and spread a generous, even amount of frosting over it.
Repeat this process, stacking the layers on top of each other. Coat the top and sides of the fully assembled cake with the remaining cream.
The essential overnight rest
When you first assemble the cake, the layers will feel hard and biscuit-like. Do not worry — this is completely normal.
The cake requires a minimum of 12 hours (preferably 24 hours) in the refrigerator. During this time, the dry honey sheets absorb the moisture from the sour cream frosting, fusing into a unified, melt-in-your-mouth structure.
How to decorate and serve
Take the saved baked dough scraps from Step 4 and crush them into fine crumbs using a food processor or rolling pin.
Sprinkle the crumbs evenly over the top and sides of the chilled cake. For an elegant touch, you can mix in a few finely chopped walnuts or drizzle a tiny bit of liquid honey right before serving. Cut into clean square or rectangular slices.
Storage and freezing guidelines
Keep the honey cake covered in the refrigerator for up to 5 days. As the days pass, the flavor profile deepens and becomes even richer.
| Storage Type | Duration / Status |
|---|---|
| ❄️ Refrigerator | 5 Days |
| 🧊 Freezer Friendly | 3 Months |
| ✅ Make-Ahead Dish | Excellent |
To freeze, wrap individual slices tightly in plastic wrap and aluminum foil. Thaw in the refrigerator overnight before enjoying.
Nutrition information (per slice)
| Nutrient | Value |
|---|---|
| 🔥 Calories | 380 |
| 🌾 Carbs | 44g |
| 🥛 Protein | 5g |
| 🧈 Fat | 21g |
Frequently asked questions
Can I use regular granulated sugar instead of honey?
No, honey is essential for this recipe. It provides the unique moisture-absorbing quality that softens the layers, as well as the signature flavor profile.
Why are my cake layers hard right after baking?
The layers are supposed to be crisp, like cookies, right after they cool. They will fully soften into a delicate cake texture after resting with the frosting overnight.
Can I make this dessert two days in advance?
Yes! This is one of those rare cakes that actually tastes significantly better on day two or three than it does on day one.