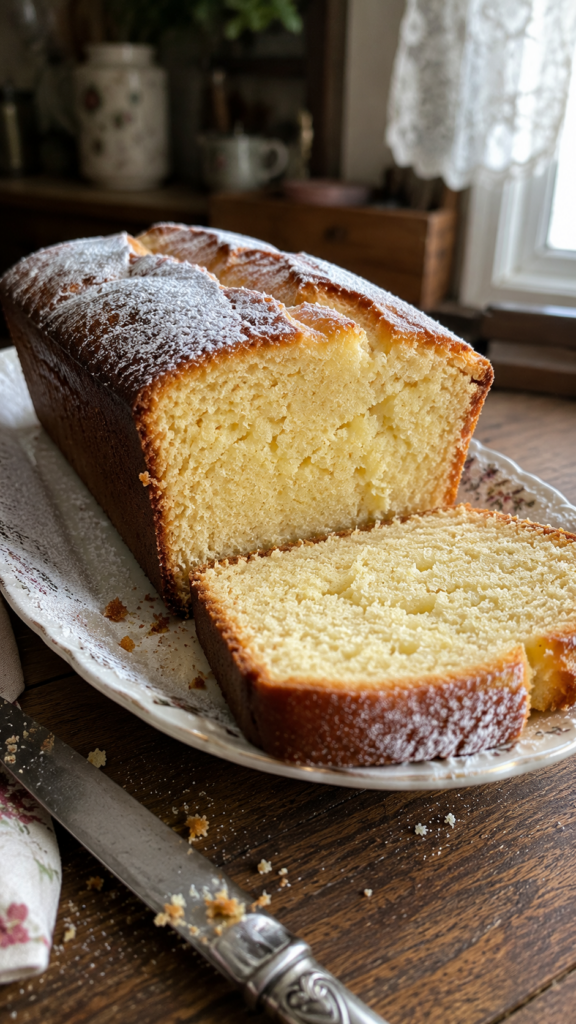
Rediscover the comfort of a true classic with this ultimate, comprehensive guide to making an authentic, old-fashioned Grandma’s Cake. Featuring a rich, buttery crumb, subtle citrus zest aromas, and a perfectly golden crust, this step-by-step professional recipe covers everything from traditional creaming methods to structural baking science.
The Legacy of Grandma’s Kitchen: Why Simple Baking Lives Forever
In a modern culinary world filled with overly complicated molecular gastronomy and intricate multi-layered pastries, there is a powerful, undeniable movement pulling us back toward simplicity. The traditional Grandma’s Cake stands as a monument to this timeless appeal. Known affectionately across the Balkans and parts of Europe as a simple sponge, marble cake, or everyday bundt loaf, this dessert connects generations. Consequently, it reminds us of the pure joy found in basic ingredients. It is the type of dessert that didn’t rely on fancy kitchen scales, heavy chemical additives, or industrial silicone molds. Instead, it was built on basic, pantry-staple ingredients, sensory intuition, and a profound understanding of how simple heat transforms dairy, sugar, and flour into pure comfort.
The Secret of Manual Aeration
What truly sets an authentic, heritage grandma’s cake apart from a dry, uninspiring sponge is the precise execution of foundational baking mechanics. Historically, our grandmothers knew that the secret to a cake that stays moist for days lay in the manual aeration of fats and eggs. Long before electric stand mixers became a kitchen standard, the quality of a cake was determined by the endurance of the baker’s arm. Specifically, they would beat butter and sugar together until the mixture changed color from dark yellow to a pale, fluffy cream. This process creates a massive network of microscopic air pockets. These pockets expand gracefully inside the oven. As a result, you get a tight yet incredibly tender crumb structure that melts on the tongue.
A Multi-Generational Kitchen Canvas
Furthermore, this recipe represents the ultimate multi-generational kitchen canvas. It is a dessert heavily layered with fond memories of slow Sunday afternoons and the gentle hum of an old oven warming up a cold kitchen. In addition, the sweet, comforting aroma of fresh vanilla and grated lemon peel would fill the entire home. Therefore, baking this cake isn’t just about following instructions to satisfy a sweet tooth. It is truly an act of preserving domestic history. It also helps in understanding the beautiful science of home baking. In this extensive guide, we will break down the exact chemistry of fat emulsification, the critical importance of ingredient temperatures, and how to adjust this master recipe to create countless seasonal variations.
Recipe At A Glance
Ingredients You Will Need
For The Master Cake Batter
- 250 g unsalted European butter (softened to exactly 20°C / 68°F)
- 200 g granulated sugar (extra fine is preferred for better dissolving)
- 4 large eggs (must be at room temperature)
- 1 tablespoon pure vanilla extract or 2 packets of vanilla sugar
- Grating of 1 organic, unwaxed lemon (zest only)
- 350 g all-purpose flour (sifted twice to prevent lumps)
- 12 g baking powder (approximately 1 standard packet)
- 100 ml whole milk (3.5% milk fat, slightly warm)
- A generous pinch of fine sea salt
For The Finishing Touch
- 2 tablespoons powdered sugar (for a traditional dusted coating)
- 1 teaspoon melted butter (for greasing the baking pan)
Important Ingredient Notes & Temperature Control
The Temperature Rule: If there is one single reason why a Grandma’s Cake fails to rise or ends up with a dense, rubbery texture, it is the temperature of the ingredients. The butter, eggs, and milk **must all be at room temperature** before you begin mixing. When cold eggs hit creamed warm butter, the fat immediately hardens and separates. Consequently, this breaks the delicate emulsion. This results in a curdled batter that cannot trap air effectively during baking. Therefore, you should take your ingredients out of the refrigerator at least two hours before you intend to start.
The Flour Selection: Standard all-purpose flour with a protein content of around 10-11% is ideal for this recipe. However, you must avoid using high-protein bread flours. Heavy mixing will develop too much gluten, transforming your soft, melting sponge into a tough, bread-like loaf. Sifting the flour alongside the baking powder and salt is highly recommended to introduce extra air into the dry mix.
How To Make Grandma’s Cake: Step 1
Step 1: Prep the Oven and Pan Geometry
Preheat your conventional oven to 180°C (350°F). However, if you are using a fan-forced oven, lower the temperature to 160°C (320°F). This adjustment prevents the top of the cake from drying out before the center cooks.
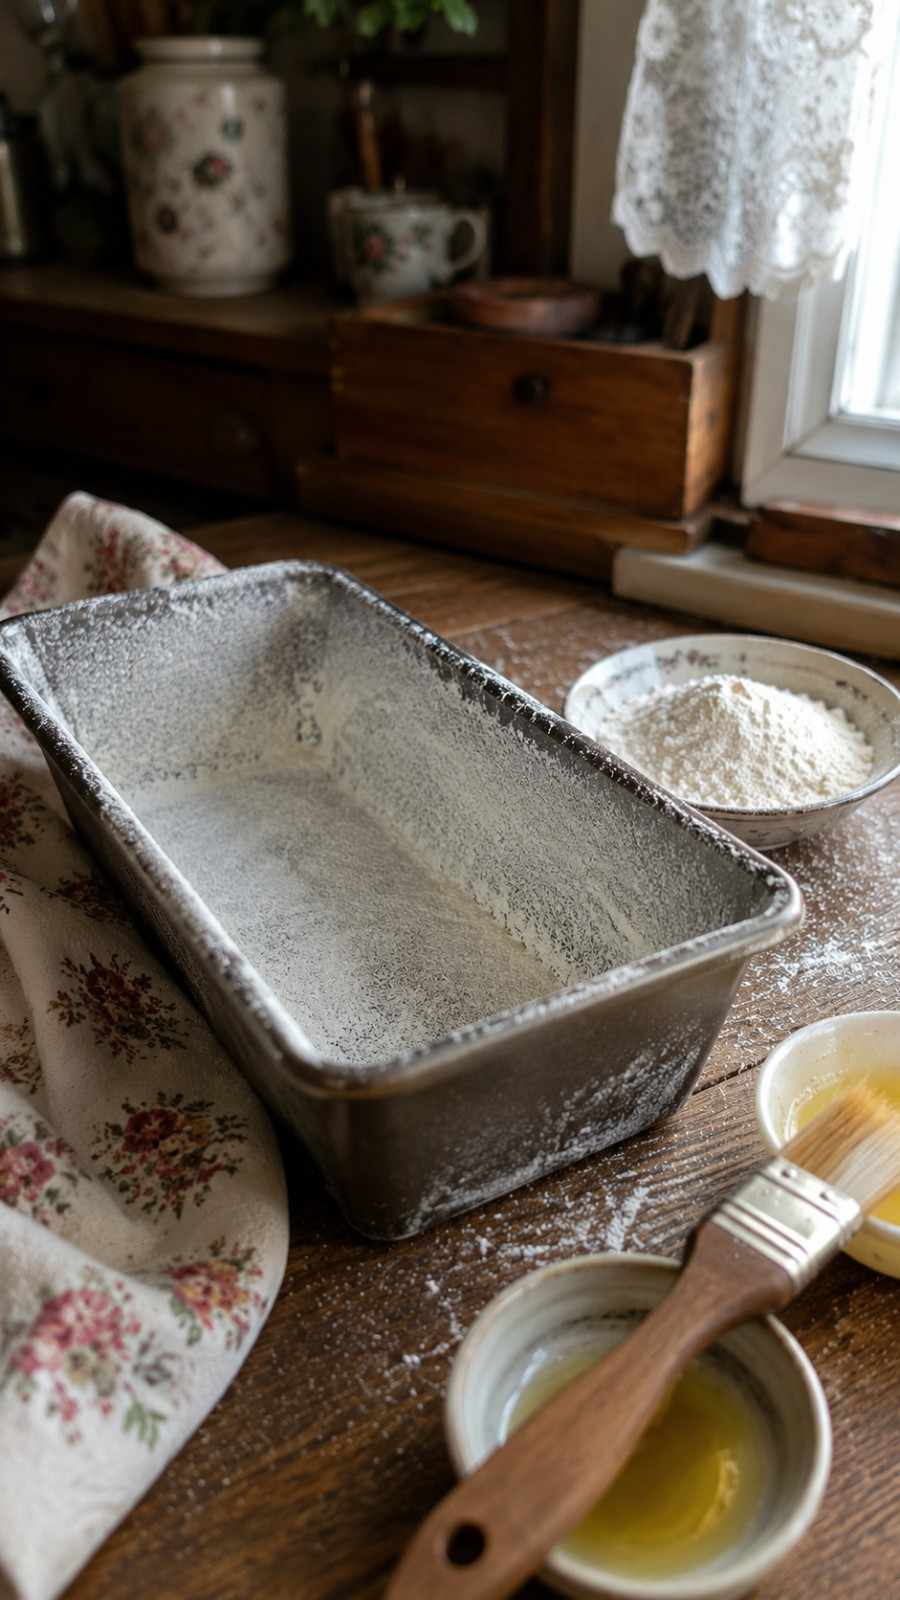
Thoroughly grease a traditional 25cm loaf pan or a classic bundt pan with melted butter. After that, dust the inside with a tablespoon of flour, shaking out any excess. This dual-layer coating creates a barrier that guarantees the cake releases cleanly after baking.
How To Make Grandma’s Cake: Step 2
Step 2: The Core Creaming Process
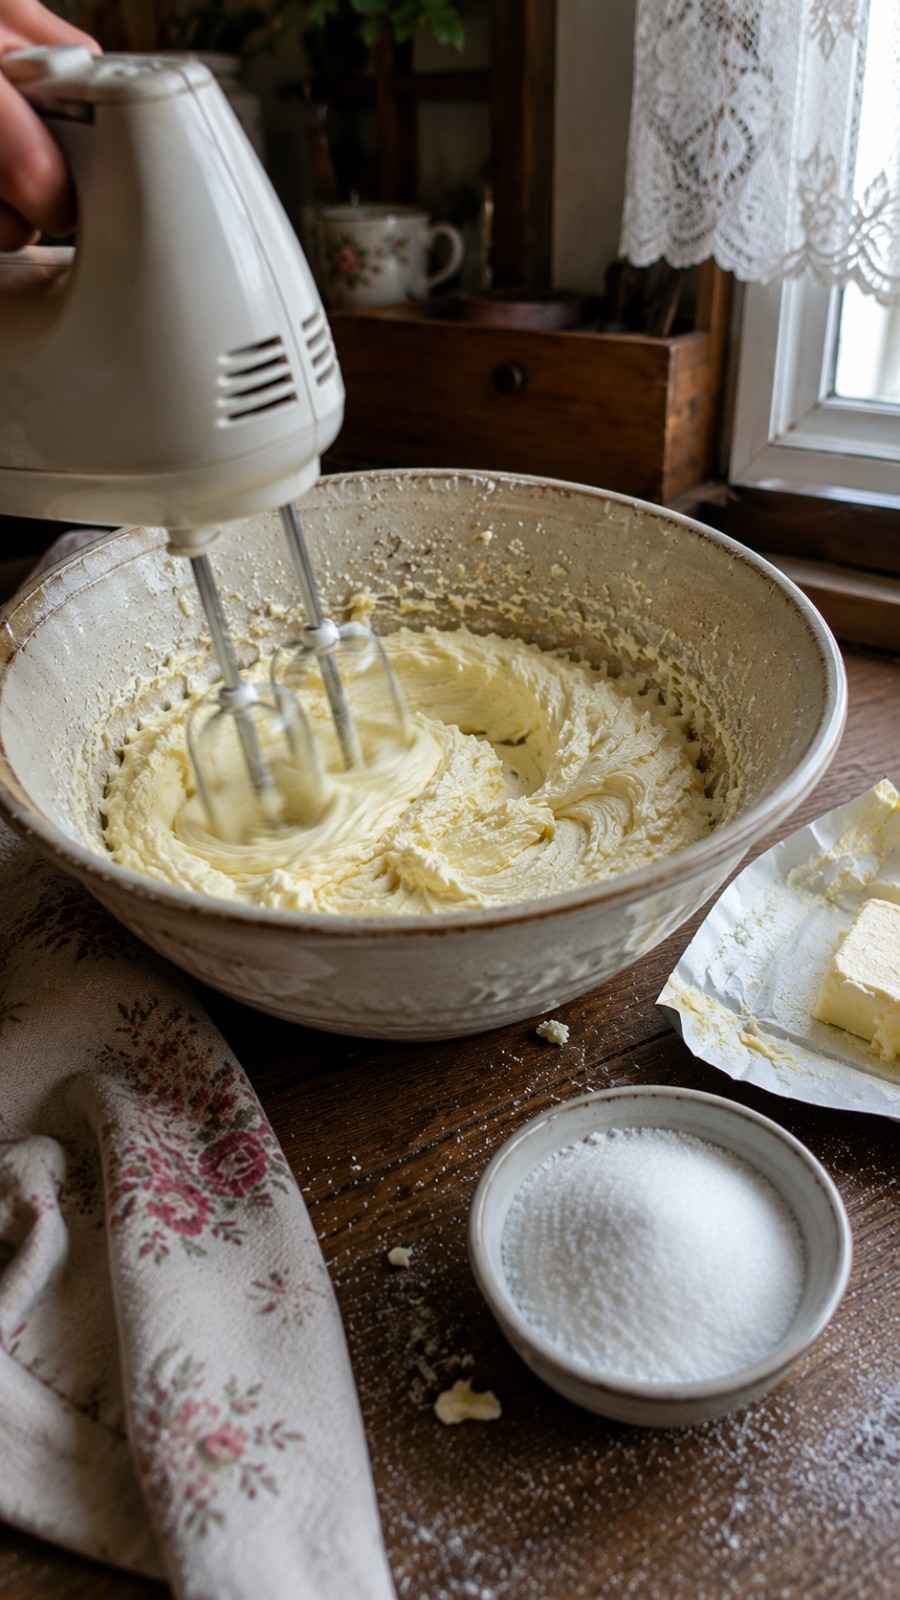
Place your fully softened butter and granulated sugar into a large mixing bowl. Next, use an electric hand mixer or a stand mixer fitted with a paddle attachment. Beat the mixture on medium-high speed for 5 to 7 minutes.
Keep mixing until the paste becomes incredibly light, airy, and pale ivory in color. This step is where you build the foundation of the cake’s fluffiness. To achieve this, you are physically forcing air into the solid fat structure.
How To Make Grandma’s Cake: Step 3
Step 3: Emulsifying the Eggs Singly
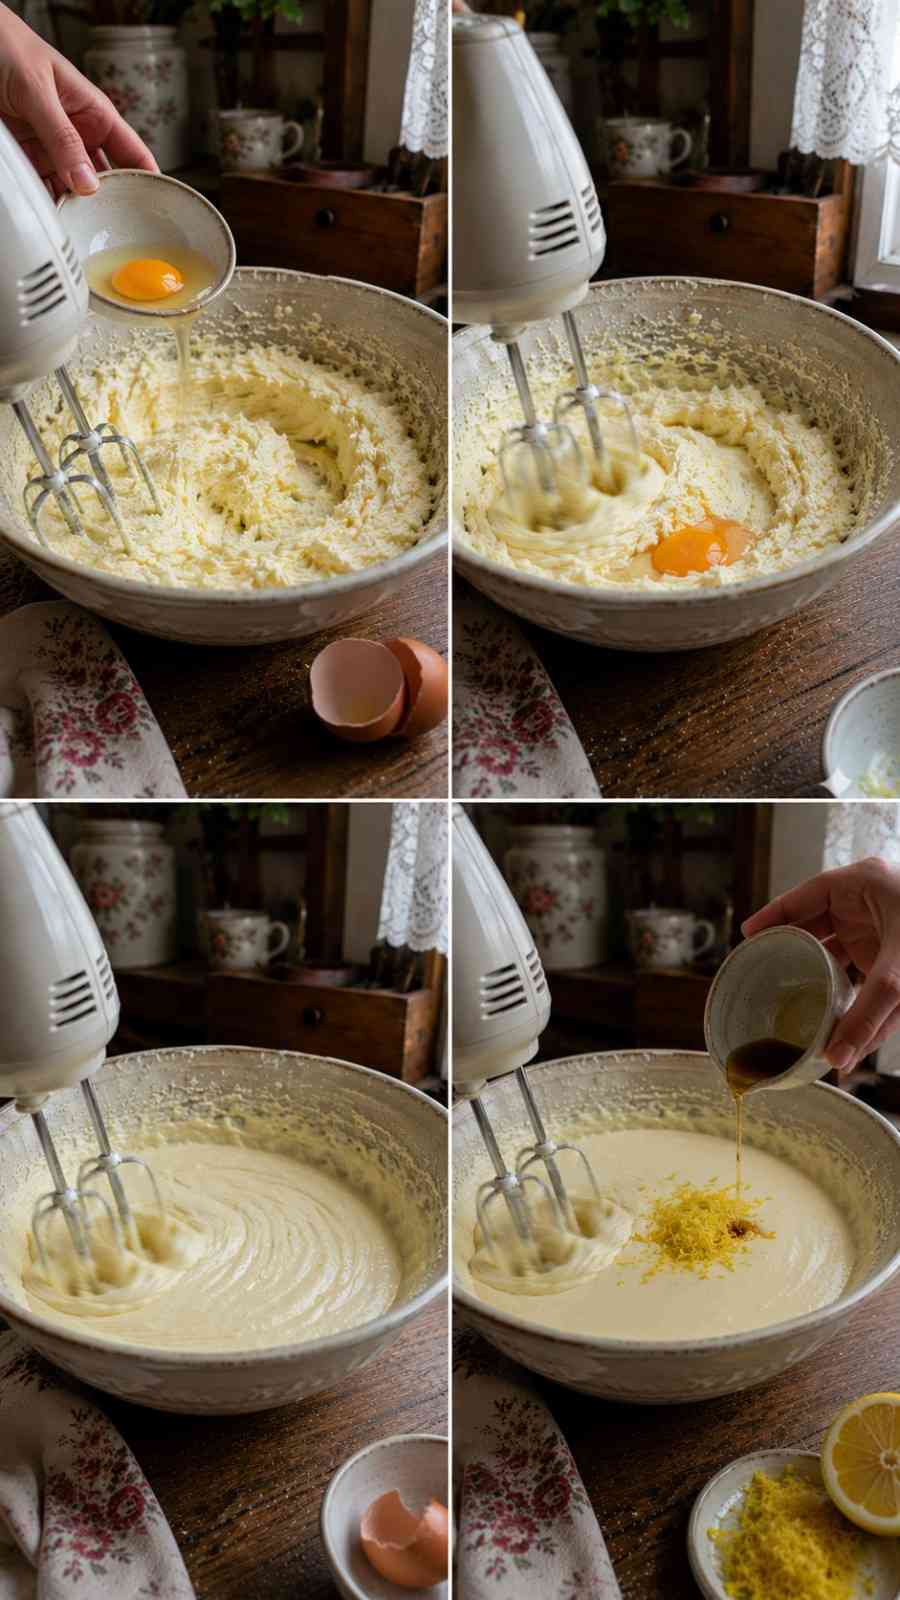
Add your room-temperature eggs **one at a time** into the fluffy butter mixture. Beat thoroughly on medium speed after each addition for about 1 minute before cracking in the next one.
This slow integration prevents the fat from separating from the liquid proteins of the egg. Along with the final egg, pour in your pure vanilla extract. In addition, add the freshly grated lemon zest, mixing gently to distribute the aromatics.
How To Make Grandma’s Cake: Step 4
Step 4: Incorporating Dry and Wet Alternately
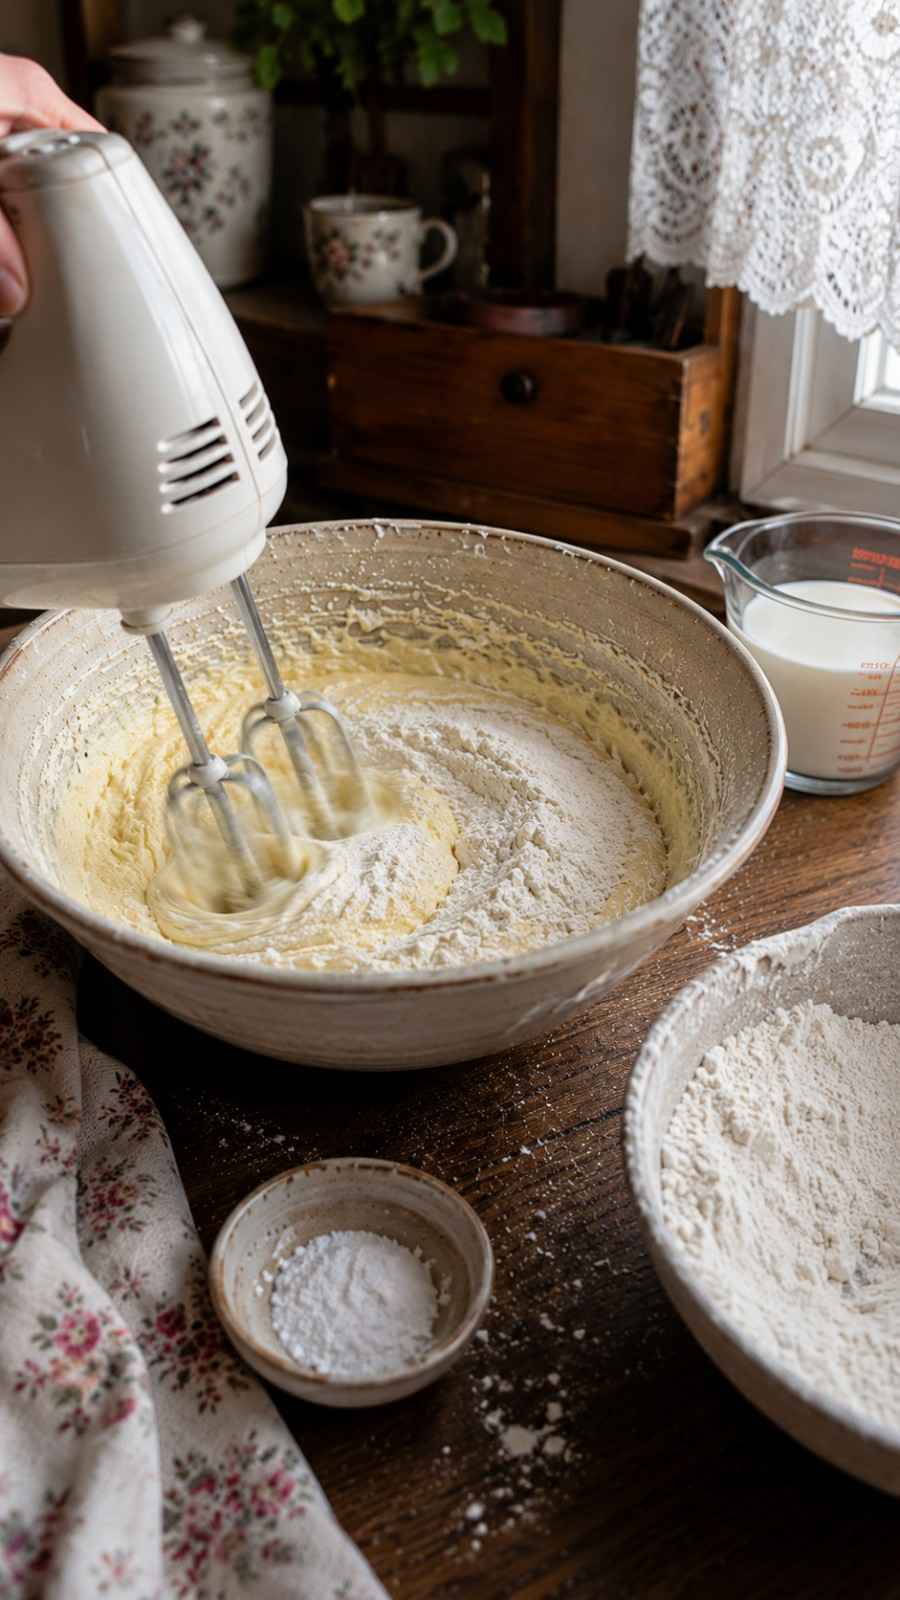
In a separate bowl, whisk together your twice-sifted all-purpose flour, baking powder, and fine sea salt. After doing that, turn your mixer down to its lowest speed setting.
Add one-third of the flour mixture, followed by half of the milk. Repeat the process, finishing with the last third of the flour. Mix *only* until the flour disappears into the wet ingredients because over-mixing here will ruin the tender texture.
How To Make Grandma’s Cake: Step 5
Step 5: Filling and Leveling the Pan
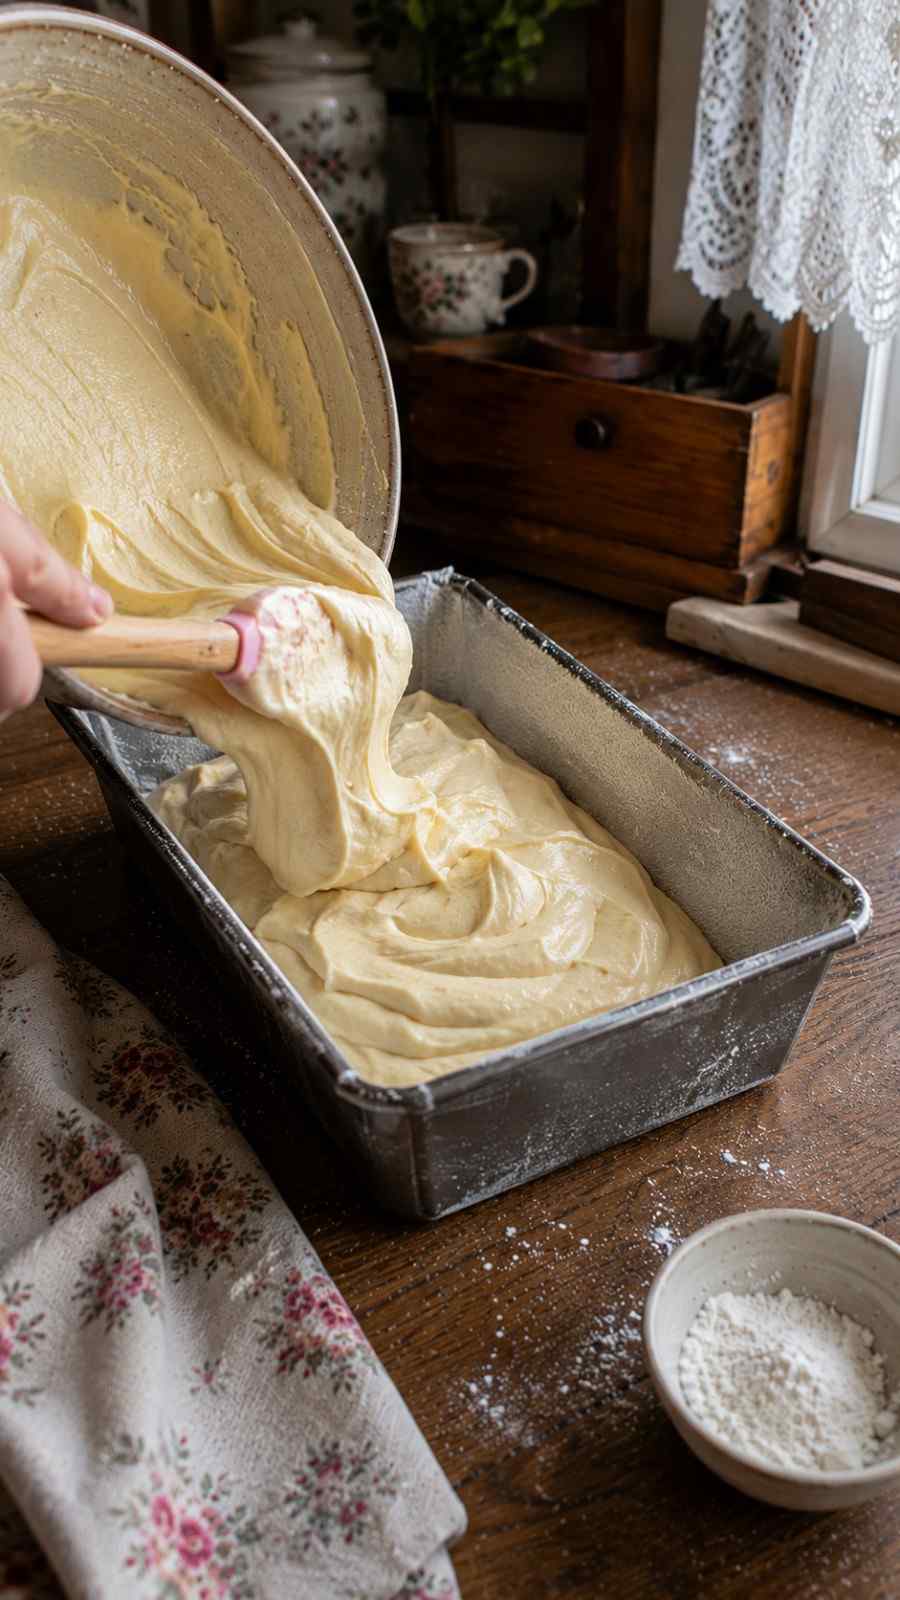
Using a rubber spatula, scrape down the sides of the bowl to ensure no pockets of dry flour remain at the bottom. Subsequently, spoon the thick, smooth batter evenly into your greased and floured baking pan.
Gently smooth out the top surface with the back of a spoon or an offset spatula. Finally, give the pan two firm taps against your kitchen counter to force any trapped, large air bubbles to rise to the surface and escape.
How To Make Grandma’s Cake: Step 6
Step 6: Baking and the Clean Toothpick Test
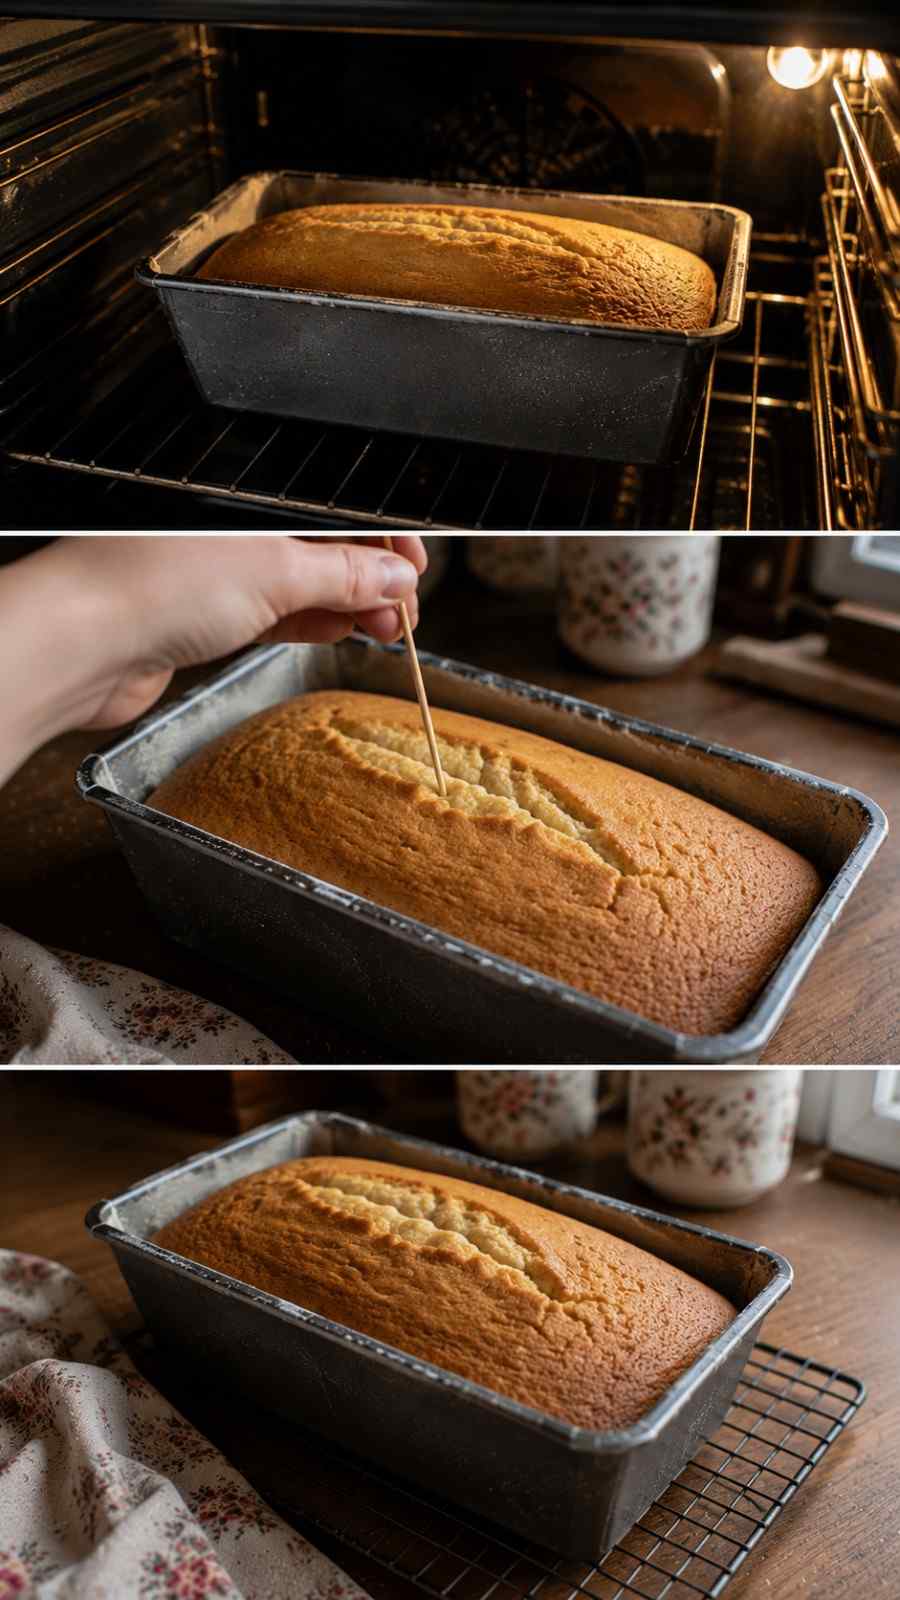
Slide the pan onto the center rack of your preheated oven. Bake undisturbed for 40 to 45 minutes. **Do not open the oven door during the first 30 minutes**, or the sudden rush of cool air can cause the cake’s center to collapse.
At the 42-minute mark, insert a long wooden toothpick into the thickest part of the center. If it slides out clean or with a few dry crumbs attached, the cake is completely baked. Afterwards, remove it from the oven and let it cool in the pan for 15 minutes.
Troubleshooting: Common Sponge Cake Failures
Even though this recipe is incredibly straightforward, minor deviations in kitchen environment or ingredient measurement can lead to less-than-perfect results. A common frustration is a cake that **sinks drastically in the center** during the cooling process. This typically indicates that too much baking powder was added. Consequently, the air cells expand beyond their structural capacity and rupture. Alternatively, the oven door was opened far too early, dropping the internal baking pressure before the flour proteins had fully set.
If your cake turns out **dry and crumbly**, the culprit is almost always either over-baking or inaccurate flour measurement. Scooping flour directly from the bag using a measuring cup packs the flour tightly. As a result, you add up to 30% more starch than intended. Therefore, always fluff your flour with a fork, spoon it into your measuring container, and level it off. Alternatively, switch to using a digital kitchen scale for absolute precision.
Flavor Variations Worth Trying
Once you have mastered the traditional vanilla and lemon base, you can use this exact master batter as a launchpad for several historic family variations.
The Marble Cake Classic (Mramorni Kolač): Separate one-third of the completed batter into a separate bowl. Fold in 2 tablespoons of high-quality Dutch-processed cocoa powder and 2 tablespoons of warm milk. Spoon the light and dark batters into the pan alternately. Then, drag a table knife through the mixture in a zigzag pattern to create a stunning marbled effect.
The Seasonal Fruit Infusion: Right before pouring the batter into the pan, gently fold in 150 grams of fresh, dry blueberries, sour cherries, or chopped raspberries. To prevent the fruit from sinking directly to the bottom of the pan during baking, toss the berries in a single teaspoon of dry flour before adding them to the batter.
Storage and Freezing Guidelines
Unlike modern pastries filled with delicate dairy creams, an old-fashioned Grandma’s Cake keeps exceptionally well. Therefore, it makes a fantastic make-ahead option for busy weeks.
To preserve its signature moisture, allow the cake to cool completely to room temperature before wrapping it tightly in plastic wrap. Alternatively, you can place it inside a dedicated cake dome. Storing it uncovered will cause the dry air to siphon away its softness within hours. If you wish to freeze the cake, slice it into individual portions beforehand. After that, wrap each slice in cling film, and store them inside a heavy-duty freezer bag. Thaw individual slices on your counter for 20 minutes before serving.
Nutrition Information (Per Thick Slice)
The nutritional values below represent calculations based on an equal 12-slice division of the master vanilla and lemon loaf cake.
Frequently Asked Questions (FAQ)
Can I substitute the butter with vegetable oil?
While vegetable oil creates an incredibly moist cake, it lacks the structural ability to hold air bubbles during the creaming stage. Using oil will result in a significantly denser cake with a texture closer to a muffin rather than the light, melt-in-your-mouth crumb characteristic of a traditional butter sponge.
Why did my cake crack deeply across the entire top surface?
A minor central crack is completely normal for heavy loaf cakes, but a massive, jagged split usually points to an oven that is running too hot. The intense top heat forces the outer crust to form and harden before the liquid batter in the center has finished expanding. Consequently, this forces the inside to explosively burst through the top layer.
How can I make this recipe completely dairy-free?
To safely eliminate dairy while protecting the heritage flavor profile, swap out the European butter for a high-fat block of plant-based baking butter. In addition, replace the whole cow’s milk with unsweetened almond milk or creamy oat milk at a strict 1:1 ratio.