Best Sushi Rice Recipe
Sticky enough to hold its shape, soft and fluffy on the inside, and seasoned with just the right balance of sweet, salty and tangy. The exact method that makes sushi rice actually taste like sushi rice.
A great sushi roll starts with one essential component: perfectly prepared rice. This best sushi rice recipe creates rice that is sticky enough to hold together, soft yet fluffy, and seasoned with the ideal balance of sweetness, saltiness, and acidity.
Many people think sushi rice is difficult to make at home, but the truth is that it becomes simple once you understand the technique. The key lies in choosing the right rice, rinsing it properly, and seasoning it while it is still warm.
Whether you are making sushi rolls, nigiri, poke bowls, or sushi burritos, mastering sushi rice will instantly improve every dish. Even better, this recipe uses simple ingredients and delivers reliable results every time.
Why sushi rice matters
Many people focus only on the fish or fillings, but sushi rice is actually the foundation of great sushi.
Additionally, the texture must be balanced. The rice should feel sticky enough to hold shape while still remaining soft and fluffy.
Most importantly, proper seasoning transforms plain cooked rice into authentic sushi rice with signature flavor.
Quick recipe info
| Detail | Value |
|---|---|
| ⏱️ Prep Time | 15 Min |
| 🔥 Cook Time | 20 Min |
| ❄️ Cooling Time | 15 Min |
| 🍽️ Yield | 4 Servings |
| 👨🍳 Difficulty | Easy |
Ingredients you’ll need
- 2 cups sushi rice (Japanese short-grain rice)
- 2¼ cups water
- 4 tbsp rice vinegar
- 2 tbsp sugar
- 1 tsp salt
The full recipe
Here’s everything condensed into one printable card — check off ingredients as you go, and follow the numbered steps in order.
Best Sushi Rice
Serves 4 · Prep 15 min · Cook 20 min · Cooling 15 min
Ingredients
Method
- Rinse the rice. Swirl the rice in cold water and drain, repeating 4-5 times until the water runs mostly clear.
- Let it rest. Drain thoroughly and let the rice rest for 15-20 minutes before cooking.
- Cook the rice. Add the measured water and cook, covered, for 15-18 minutes — in a rice cooker or on the stovetop over low heat, without lifting the lid.
- Steam it. Remove from heat and let it steam, still covered, for another 10-15 minutes.
- Make the seasoning. Stir together rice vinegar, sugar and salt until fully dissolved.
- Season the rice. Pour the vinegar mixture over the hot rice and fold gently with cutting motions — never stir aggressively.
- Cool it down. Fan the rice while folding until it’s glossy and just warm or room temperature. Use right away.
Step-by-step instructions
Step 1: Rinse the rice properly
First, place the sushi rice into a large bowl and cover it with cold water.
Using your hands, gently swirl the rice around for a few seconds.
The water will quickly turn cloudy because of excess surface starch.
Drain the water and repeat this process 4–5 times until the water becomes mostly clear.
This step is essential because properly rinsed rice cooks with a cleaner texture and avoids becoming overly gummy.
Step 2: Let the rice rest
After rinsing, drain the rice thoroughly using a fine sieve.
Then, let it rest for 15–20 minutes.
This short resting time allows the grains to absorb a little moisture before cooking, which helps improve texture.
Step 3: Cook the rice
Transfer the rinsed rice into a rice cooker or medium saucepan.
Add the measured water and ensure the rice sits evenly at the bottom.
If using a rice cooker, cook according to the machine instructions.
If cooking on the stovetop, bring the water to a gentle boil first.
Next, reduce the heat to low, cover tightly with a lid, and cook for 15–18 minutes.
Avoid lifting the lid during cooking because trapped steam is crucial for proper rice texture.
Step 4: Let the rice steam
Once the cooking time is finished, remove the pot from heat.
Keep the lid closed and allow the rice to steam for another 10–15 minutes.
This extra steaming period helps the grains finish cooking evenly and improves overall texture.
Step 5: Prepare the sushi vinegar seasoning
Meanwhile, combine rice vinegar, sugar, and salt in a small bowl.
Stir until the sugar and salt dissolve completely.
The seasoning should taste balanced with sweetness, acidity, and mild saltiness.
Step 6: Season the rice
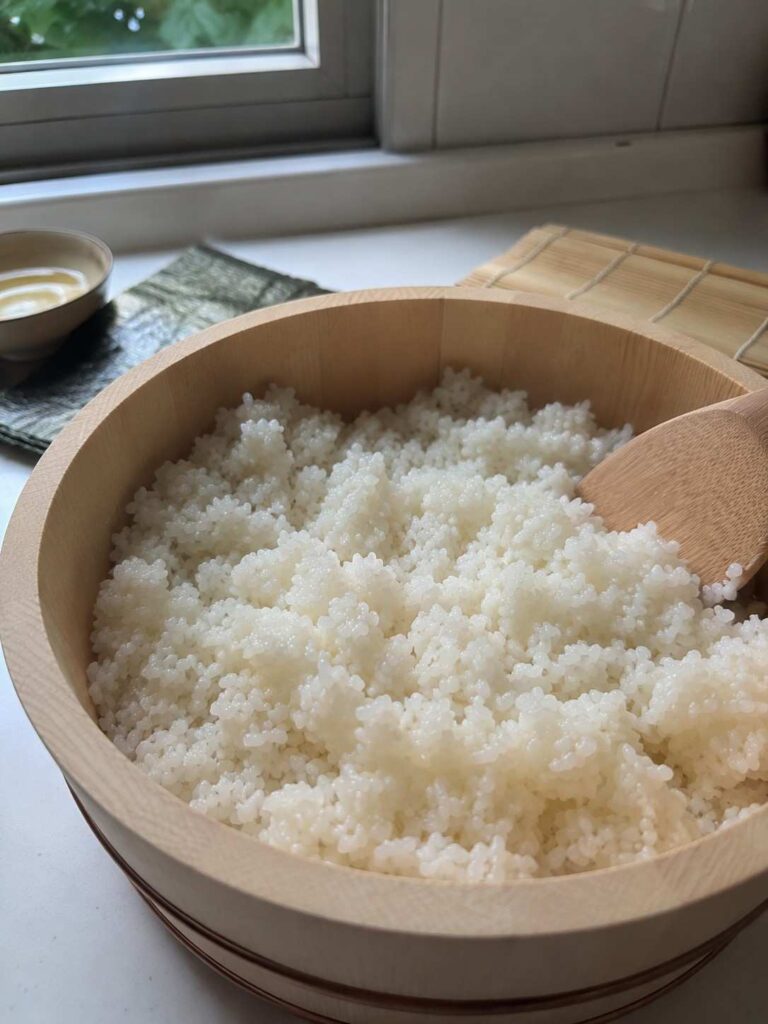
Transfer the hot cooked rice into a wide bowl, wooden sushi tub, or large shallow dish.
Next, slowly pour the prepared sushi vinegar seasoning evenly over the rice.
Using a rice paddle or spatula, gently fold the rice with slicing motions.
Avoid stirring aggressively because that can crush the grains and turn the rice mushy.
Instead, use gentle cutting and folding movements to distribute the seasoning evenly.
Step 7: Cool the rice properly
While folding the rice, gently fan it using a hand fan, paper fan, or even a small kitchen fan.
This traditional technique helps cool the rice faster while giving it the signature glossy finish.
Continue folding and cooling until the rice reaches slightly warm or room temperature.
Sushi rice should never be served cold straight from the refrigerator.
Step 8: Use or serve
Once cooled properly, the sushi rice is ready to use.
Use it immediately for sushi rolls, nigiri, poke bowls, hand rolls, or sushi burritos.
For best results, keep the rice covered with a clean damp towel until serving so it stays soft.
Expert tips for perfect sushi rice
First, always use Japanese short-grain rice because long-grain rice will not create the correct sticky texture.
Additionally, measure water carefully since even small changes can affect the final consistency.
Most importantly, season the rice while it is still hot so the vinegar mixture absorbs properly.
Storage tips
Sushi rice tastes best when used fresh on the same day.
However, if needed, keep it covered at room temperature for a few hours.
Avoid refrigerating sushi rice because cold temperatures make it dry and hard.
Frequently asked questions
Can I use regular white rice?
No. Regular long-grain rice does not have enough starch to create authentic sushi rice texture.
Do I need a rice cooker?
No. A saucepan works perfectly as long as you follow the cooking and steaming steps carefully.
Can I make sushi rice ahead of time?
Yes, but it tastes best when used within a few hours after preparation.
Why everyone loves this sushi rice recipe
People love this recipe because it creates sushi rice with authentic flavor, ideal stickiness, and soft texture.
Additionally, the balanced seasoning makes every bite taste fresh, bright, and flavorful.
Most importantly, this recipe is simple enough for beginners while delivering restaurant-quality results at home.